


In the previous article, we saw how to create a Kubernetes cluster on Civo.com easily. Today, we will see how to deploy a web application on this cluster. This article is written from the perspective of a developer: the goal is not to manage a cluster but to be able to quickly deploy your code on a platform to see the result quickly. To be able to reproduce the tutorial presented in this article, you will first need to create a Kubernetes cluster, as explained in the previous article: "Create a Kubernetes cluster on Civo.com".
We will develop a web service in Go (You need to install Go; we will build the application when building the Docker image - therefore, you will need to have Docker installed on your computer).
If you don’t like or don’t know Go, this tutorial is very easy to adapt to other languages.
👋 if you don't want to execute all the commands on your computer, I "Gitpodified" a project for you: https://github.com/bots-garden/civo-02-deploy-webapp so you don't need to install anything: you have everything ready to go 🚀
Create the Go application
Create a
hello-worlddirectoryInto the
hello-worlddirectory, type the following commandgo mod init hello-wordThen, create a
main.gofile with the following content:
package main

import (
    "log"
    "github.com/gofiber/fiber/v2"
)

func main() {
    app := fiber.New()

    app.Get("/", func (c *fiber.Ctx) error {
        return c.SendString("👋 Hello, World! 🌍")
    })

    log.Fatal(app.Listen(":8080"))
}
Type
go mod tidyto download the dependencyYou can run the service:
go run main.go
Dockerize the Go application
Create a Dockefile into ./hello-world with the following content:
# Build the application from source
FROM golang:1.20 AS build-stage

WORKDIR /app

COPY go.mod go.sum ./
RUN go mod download

COPY *.go ./

RUN CGO_ENABLED=0 GOOS=linux GOARCH=amd64 go build -ldflags="-s -w" -o hello-world

# Deploy the application binary into a lean image
FROM scratch

WORKDIR /

COPY --from=build-stage /etc/ssl/certs/ca-certificates.crt /etc/ssl/certs/
COPY --from=build-stage /app/hello-world .
EXPOSE 8080
CMD ["/hello-world"]
We use the Multi-stage builds method, and then the Go application is built (compiled) when the Docker image is built.
Build the image
To build the Docker image of the application, use the following commands:
IMAGE_NAME="demo-hello-world"
docker build -t ${IMAGE_NAME} .
docker images | grep ${IMAGE_NAME}
The last command will display the size og the image. As the last layer of the build is a
scratchimage, the size of the image is pretty small (<7MB). It could be useful for demonstrations.
Test the image
To test the Docker image of the application, use the following commands:
IMAGE_NAME="demo-hello-world"
HTTP_PORT=8080
docker run \
-p ${HTTP_PORT}:${HTTP_PORT} \
${IMAGE_NAME}
Then you can call the service like this: curl http://localhost:8080
Publish the image on the Docker Hub
To publish the Docker image of the application on the Docker Hub, use the following commands:
IMAGE_NAME="demo-hello-world"
IMAGE_TAG="0.0.0"
docker login -u ${DOCKER_USER} -p ${DOCKER_PWD}
docker tag ${IMAGE_NAME} ${DOCKER_USER}/${IMAGE_NAME}:${IMAGE_TAG}
docker push ${DOCKER_USER}/${IMAGE_NAME}:${IMAGE_TAG}
Test the image remotely
To test the Docker image from the Docker Hub, use the following commands:
IMAGE_NAME="demo-hello-world"
IMAGE_TAG="0.0.0"
HTTP_PORT=8080

docker run \
-p ${HTTP_PORT}:${HTTP_PORT} \
${DOCKER_USER}/${IMAGE_NAME}:${IMAGE_TAG}
We have everything we need to move on to the next step: deploying our web service. The principle is simple: we have to write a kind of “recipe” to explain to the Kubernetes cluster where the Docker image of the application is and how to start it. You will see it’s relatively straightforward to do, and above all, you can reuse the recipe for other applications (with some adaptations).
Deploy the application on the Kubernetes cluster
We need a yaml manifest to describe the Service, the Deployment and the Ingress. Create into the hello-world directory a deploy.yaml file with the following content:
---
# Service
apiVersion: v1
kind: Service
metadata:
  name: demo-hello-world
spec:
  selector:
    app: demo-hello-world
  ports:
    - port: 80
      targetPort: 8080
---
# Deployment
apiVersion: apps/v1
kind: Deployment
metadata:
  name: demo-hello-world
spec:
  replicas: 1
  selector:
    matchLabels:
      app: demo-hello-world
  template:
    metadata:
      labels:
        app: demo-hello-world
    spec:
      containers:
        - name: demo-hello-world
          image: k33g/demo-hello-world:0.0.0
          ports:
            - containerPort: 8080
          imagePullPolicy: Always

---
# Ingress
apiVersion: networking.k8s.io/v1
kind: Ingress
metadata:
  name: demo-hello-world
spec:
  rules:
    - host: demo-hello-world.17d4505a-657f-4bbb-9779-8868f287b6a6.k8s.civo.com
      http:
        paths:
        - path: /
          pathType: Prefix
          backend:
            service:
              name: demo-hello-world
              port:
                number: 80
The value of the
hostkey of the Ingress section is composed of the name of the application (demo-hello-world) and the DNS name of the Kubernetes cluster.When you change and update the web service, you will need to change the line
image: k33g/demo-hello-world:0.0.0with the new Docker image tag.
To get the DNS name of a Civo K8S cluster, you can use this command:
CLUSTER_REGION="FRA1"
CLUSTER_NAME="first-cluster"

civo --region=${CLUSTER_REGION} kubernetes show ${CLUSTER_NAME}
✋ to adapt if you don't use Civo
Deploy
To deploy the application, use the following commands:
cd hello-world
export KUBECONFIG=$PWD/../config/k3s.yaml
kubectl apply -f ./deploy.yaml
You can check with K9S if the application is deployed:
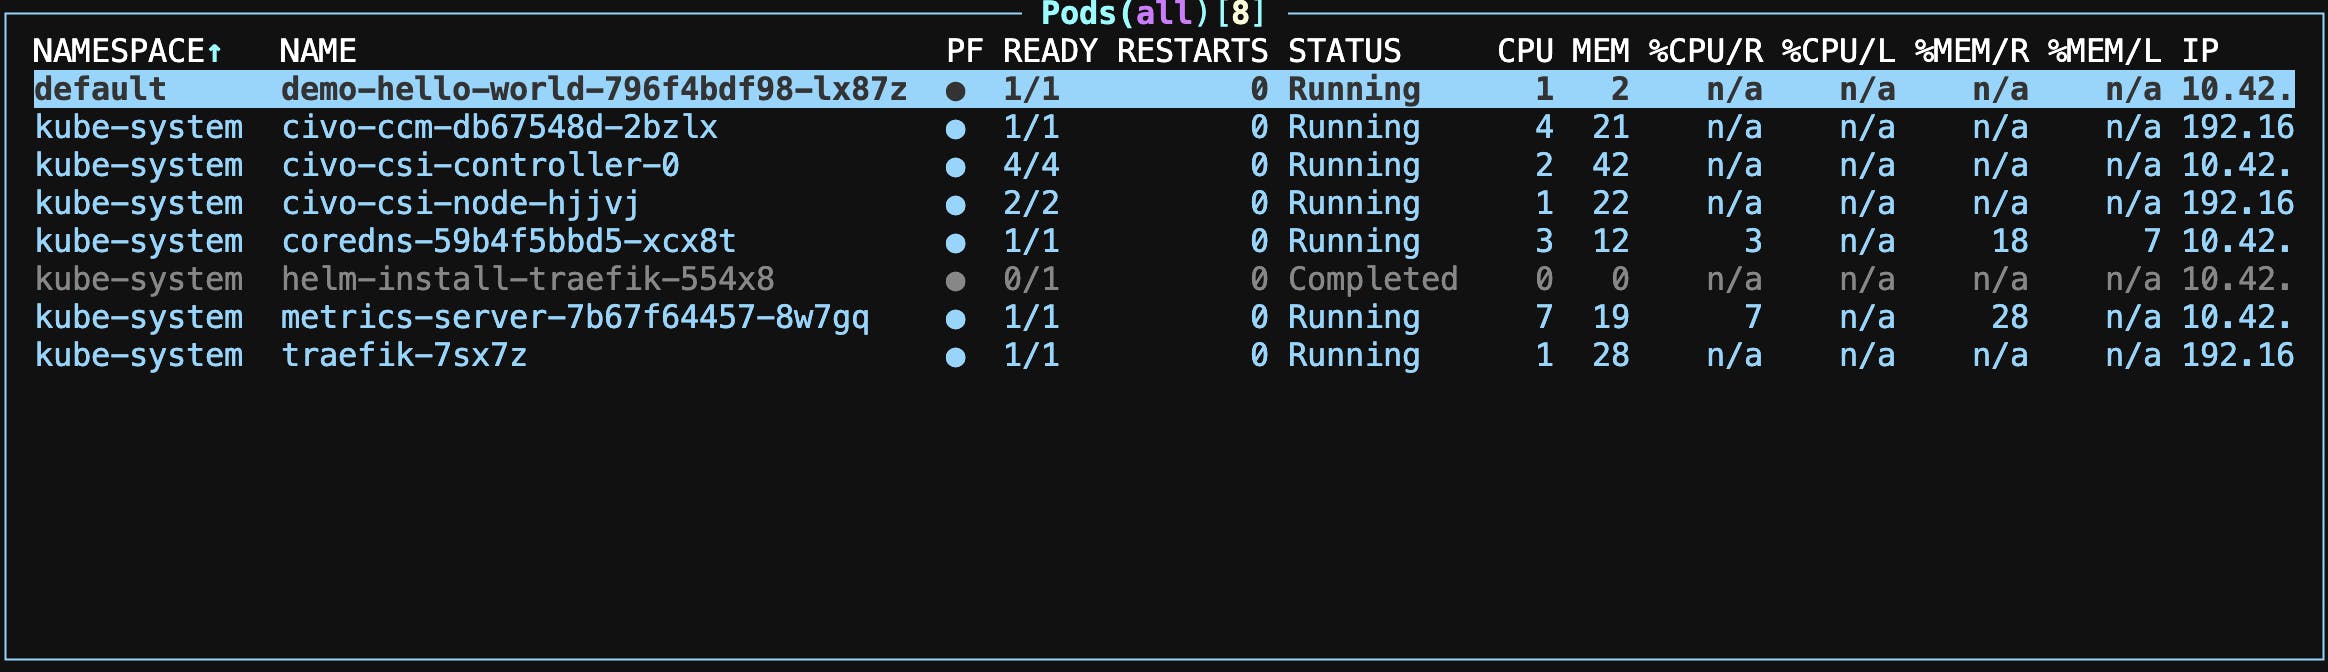
You can connect to the pod (the deployed instance of your container) and check that the service is started:

Get the URL of the deployed web application
export KUBECONFIG=$PWD/config/k3s.yaml

WEBAPP_NAME="demo-hello-world"
KUBE_NAMESPACE="default"
kubectl describe ingress ${WEBAPP_NAME} -n ${KUBE_NAMESPACE}
Then you can curl the web application, ex curl http://demo-hello-world.17d4505a-657f-4bbb-9779-8868f287b6a6.k8s.civo .com
😢 If you encountered a problem with Civo's DNS (or other provider's DNS)
I am using a project I created a few weeks ago that worked well. But today, while writing this blog post, I “fell” on a DNS problem:
curl http://demo-hello-world.17d4505a-657f-4bbb-9779-8868f287b6a6.k8s.civo
.com
curl: (6) Could not resolve host: demo-hello-world.17d4505a-657f-4bbb-9779-8868f287b6a6.k8s.civo.com
There was a problem on the FRA1 zone, by switching the zone to LON1 I solved the DNS issue (thanks, @rverchere for the debugging help 🥰)
I suggest you use a “workaround” to reach the web service (thanks, @_louidji, for the tips 🥰).
Edit the yaml manifest and replace this line:
- host: demo-hello-world.17d4505a-657f-4bbb-9779-8868f287b6a6.k8s.civo.com
by this one:
- host: demo-hello-world.74.220.29.63.sslip.io
Then deploy again the application:
kubectl apply -f ./deploy.yaml
Check again the ingress:
WEBAPP_NAME="demo-hello-world"
KUBE_NAMESPACE="default"
kubectl describe ingress ${WEBAPP_NAME} -n ${KUBE_NAMESPACE}
You should get something like this:
Name:             demo-hello-world
Labels:           <none>
Namespace:        default
Address:          17d4505a-657f-4bbb-9779-8868f287b6a6.k8s.civo.com
Ingress Class:    traefik
Default backend:  <default>
Rules:
  Host                                    Path  Backends
  ----                                    ----  --------
  demo-hello-world.74.220.29.63.sslip.io
                                          /   demo-hello-world:80 (10.42.0.7:8080)
Annotations:                              <none>
Events:                                   <none>
Then test the service again (and it works! 🎉):
curl http://demo-hello-world.74.220.29.63.sslip.io
👋 Hello, World! 🌍
sslip.io is a DNS (Domain Name System) service that returns that IP address when queried with a hostname with an embedded IP address. It was inspired by xip.io.
Remove the application
To remove (un-deploy) the application, use the following commands:
cd hello-world
export KUBECONFIG=$PWD/../config/k3s.yaml
kubectl delete -f ./deploy.yaml
🎉 That's all for today 🙂