Create easily your first K8S cluster on Civo.com ... And do it again, and again, and ...
1st contact with Civo

As a developer, I don’t want to understand “everything” about Kubernetes, and I especially don’t want to bother installing and maintaining it. However, I need and want to use it to deploy applications (this is becoming essential nowadays). I also need to understand how to monitor these applications. When I need a Kubernetes cluster for my tests, the easiest way for me is to use the Civo.com platform. Civo is Kubernetes as a service and is extremely easy to use. With Civo I can quickly provision a cluster in less than a minute (or barely more), do my tests, destroy the cluster because I made a mistake and did something wrong, recreate it to try again, etc … Civo helps me a lot in my development+deployment cycle, and allows me to restart this cycle several times a day, which is a creativity accelerator because I can restart my cycle and test lots of things several times a day (per hour). In short, I fell in love with the Civo platform, and this blog post, the first in a series, will teach you how to create your first cluster on Civo.com.
By the end of this blog post, you can create and delete clusters on the fly as many times as you want. 💪
👋 if you don't want to execute all the commands on your computer, I "Gitpodified" a project for you: https://github.com/bots-garden/civo-01-create-cluster so you don't need to install anything: you have everything ready to go 🚀
Requirements
Of course, you need to create an account on Civo.com.
Security
You will need a Civo API Key: go to https://dashboard.civo.com/security and copy your key somewhere. Store the value of the key in an environment variable: CIVO_API_KEY.
Tools
You will need:
kubectl:
K9s: a Kubernetes CLI to manage your clusters (this tool is very useful)
Civo CLI: you can create a cluster on Civo.com with the administrator web UI. But using the CLI is very straightforward:
I used this:
    curl -sL https://civo.com/get | sh
    sudo mv /tmp/civo /usr/local/bin/civo
Create your first cluster
Initialize the CLI
# Add the key to the CLI tool
civo apikey add civo-key ${CIVO_API_KEY}
civo apikey current civo-key
Create the cluster
We are going to create a cluster with these specifications:
Name:
first-clusterSize:
g4s.kube.xsmall, use this command to get all the possible sizes:civo kubernetes sizeNodes: we will use only a single node
Region:
FRA1(Frankfurt, Germany ), use this command to get all the regions:civo region ls
Type these commands to create the cluster and wait for around one minute:
# Create a directory to store the configuration file to connect to the cluster
mkdir -p config
export KUBECONFIG=$PWD/config/k3s.yaml

CLUSTER_NAME="first-cluster"
CLUSTER_NODES=1
CLUSTER_SIZE="g4s.kube.xsmall"
CLUSTER_REGION="FRA1"

# Create the cluster
civo kubernetes create ${CLUSTER_NAME} \
--size=${CLUSTER_SIZE} \
--nodes=${CLUSTER_NODES} \
--region=${CLUSTER_REGION} \
--wait
Output:
Creating a 1 node k3s cluster of g4s.kube.xsmall instances called first-cluster... -
The cluster first-cluster (2757362e-ff6b-4d5b-9cdc-488cfd2260b3) has been created in 1 min 5 sec
When the cluster is created, you can check it at https://dashboard.civo.com/kubernetes
Grab the Kubernetes config file
# Get the kubernetes config file
CLUSTER_REGION="FRA1"
CLUSTER_NAME="first-cluster"

civo --region=${CLUSTER_REGION} \
kubernetes config ${CLUSTER_NAME} > ./config/k3s.yaml
The content of k3s.yaml should look like this:
apiVersion: v1
clusters:
- cluster:
    certificate-authority-data: LS0tLS1CRUdJTiBDRVJUSUZJQ0FURS0tLS0tCk1JSUJkekNDQVIyZ0F3SUJBZ0lCQURBS0JnZ
    server: https://74.220.27.108:6443
  name: first-cluster
contexts:
- context:
    cluster: first-cluster
    user: first-cluster
  name: first-cluster
current-context: first-cluster
kind: Config
preferences: {}
users:
- name: first-cluster
  user:
    client-certificate-data: LS0tLS1CRUdJTiBDRVJUSUZJQ0FURS0tLS0tCk1JSUJrVENDQVRlZ0F3SUJBZ0lJUmhtZTFUb
    client-key-data: LS0tLS1CRUdJTiBFQyBQUklWQVRFIEtFWS0tLS0tCk1IY0NBUUVFSU0xUndIMVdTSW0rUmdHa
Some useful commands
Get information about the cluster
Type these commands to get information about your new cluster:
# Get the kubernetes config file
CLUSTER_REGION="FRA1"
CLUSTER_NAME="first-cluster"

civo --region=${CLUSTER_REGION} kubernetes show ${CLUSTER_NAME}
You should get something like this:
                    ID : 2757362e-ff6b-4d5b-9cdc-488cfd2260b3
                  Name : first-cluster
           ClusterType : k3s
                Region : FRA1
                 Nodes : 1
                  Size : g4s.kube.xsmall
                Status : ACTIVE
              Firewall : k3s-cluster-first-cluster-4ada-4d51b0
               Version : 1.26.4-k3s1 *
          API Endpoint : https://74.220.27.108:6443
           External IP : 74.220.27.108
          DNS A record : 2757362e-ff6b-4d5b-9cdc-488cfd2260b3.k8s.civo.com
Installed Applications : metrics-server, Traefik-v2-nodeport

* An upgrade to v1.27.1-k3s1 is available. Learn more about how to upgrade: civo k3s upgrade --help

Conditions:
+---------------------------------------+--------+
| Message                               | Status |
+---------------------------------------+--------+
| Control Plane is accessible           | True   |
+---------------------------------------+--------+
| Worker nodes from all pools are ready | True   |
+---------------------------------------+--------+
| Cluster is on desired version         | True   |
+---------------------------------------+--------+

Pool (fa6a80):
+----------------------------------------------------+---------------+--------+-----------------+-----------+----------+---------------+
| Name                                               | IP            | Status | Size            | Cpu Cores | RAM (MB) | SSD disk (GB) |
+----------------------------------------------------+---------------+--------+-----------------+-----------+----------+---------------+
| k3s-first-cluster-5951-4d51b0-node-pool-ec67-dy1v9 | 74.220.27.108 | ACTIVE | g4s.kube.xsmall |         1 |     1024 |            30 |
+----------------------------------------------------+---------------+--------+-----------------+-----------+----------+---------------+

Labels:
kubernetes.civo.com/node-pool=fa6a80a4-b142-4830-8a40-8749604c5dd7
kubernetes.civo.com/node-size=g4s.kube.xsmall

Applications:
+---------------------+-----------+-----------+--------------+
| Name                | Version   | Installed | Category     |
+---------------------+-----------+-----------+--------------+
| metrics-server      | (default) | true      | architecture |
+---------------------+-----------+-----------+--------------+
| Traefik-v2-nodeport | 2.9.4     | true      | architecture |
+---------------------+-----------+-----------+--------------+
Run K9s to connect to the cluster
export KUBECONFIG=$PWD/config/k3s.yaml
k9s --all-namespaces
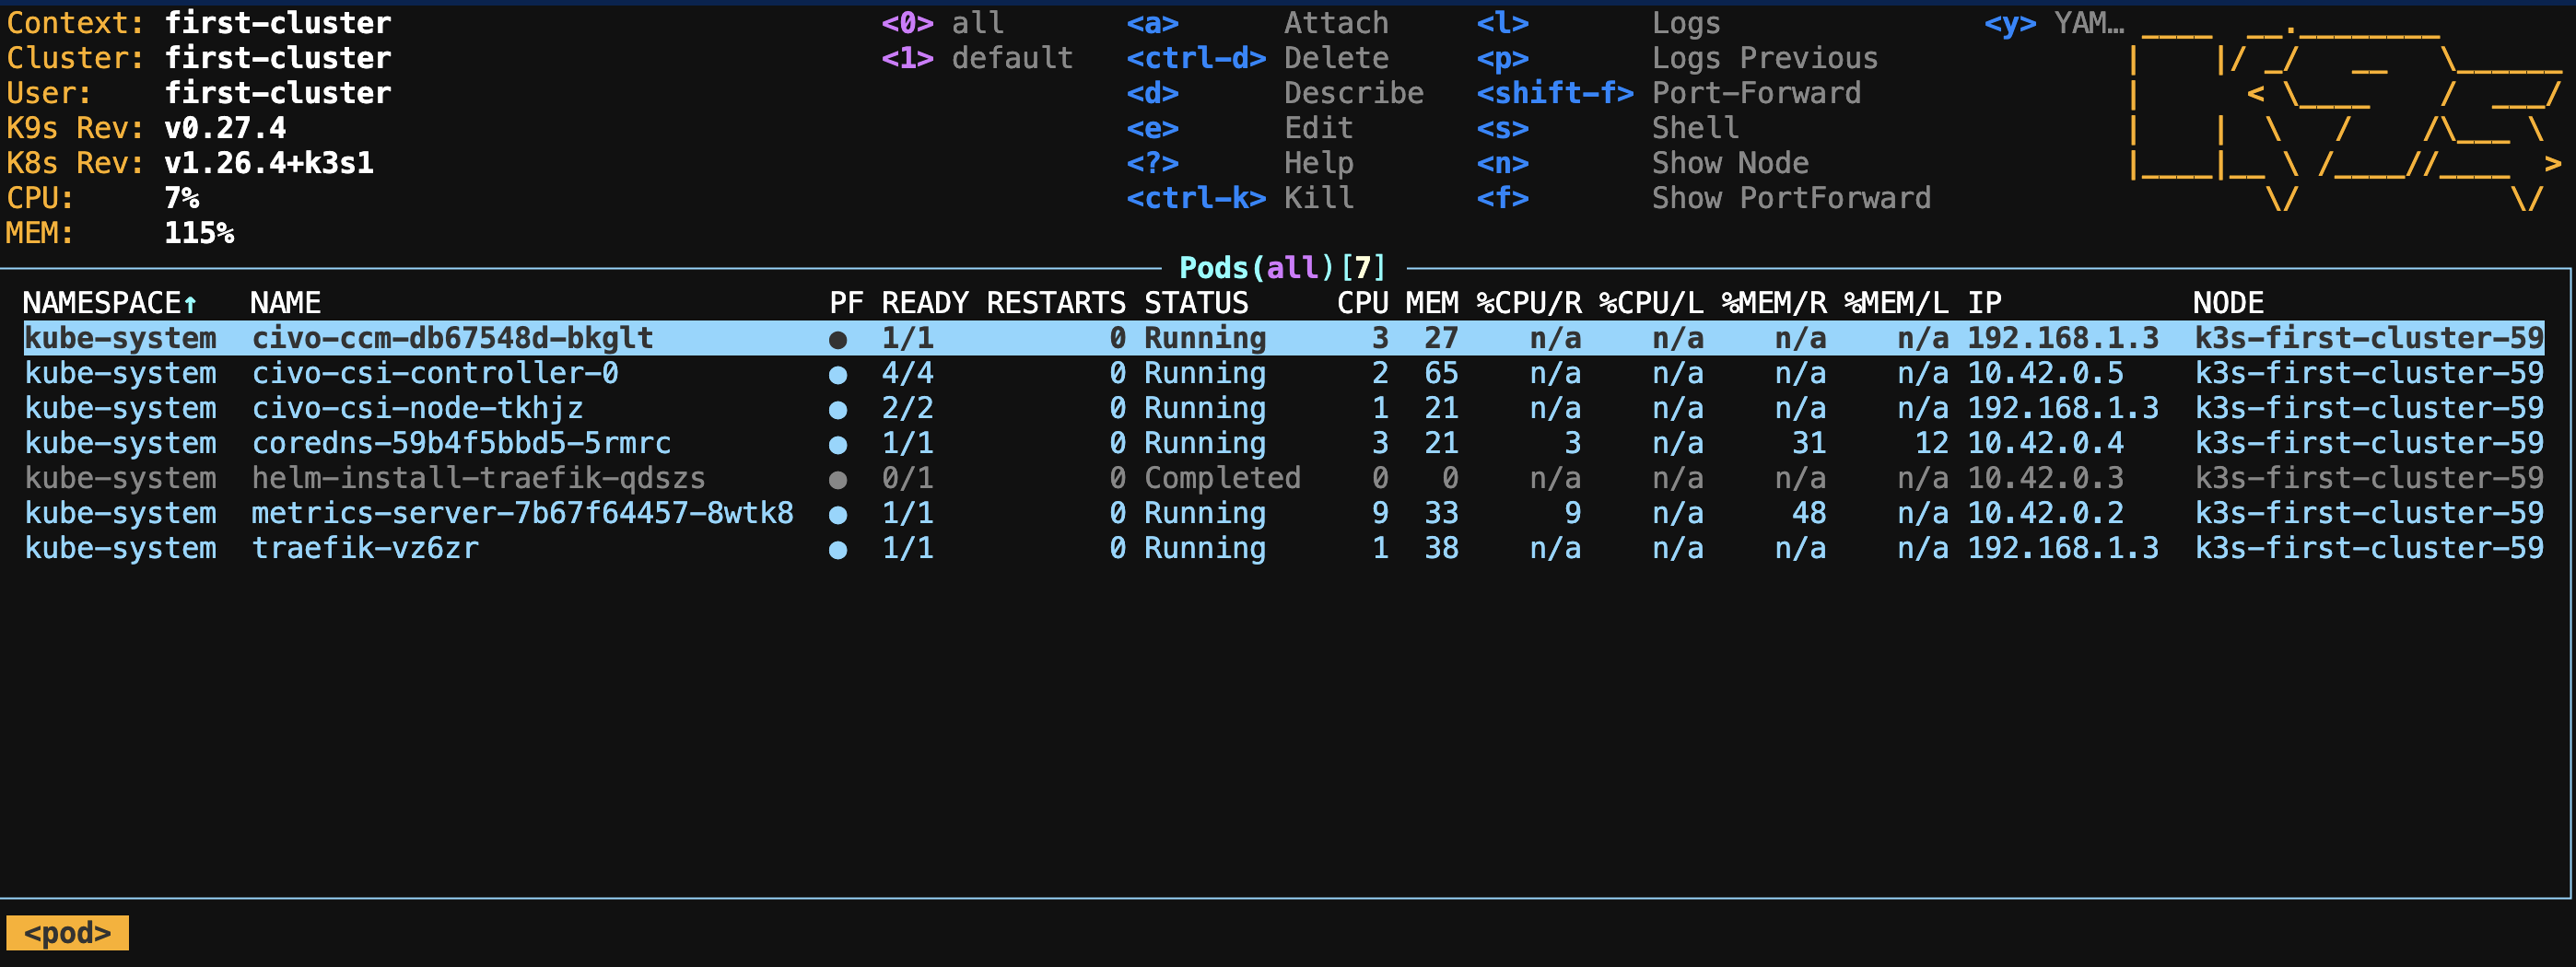
you need to export `KUBECONFIG` to allow tools (like kubectl or k9s to connect the K8S cluster)
First Deployment
example from https://kubernetes.io/docs/tutorials/hello-minikube/
To deploy a Docker image of an application to Kubernetes, you must create a deployment with the following command:
# Run a test container image that includes a webserver
kubectl create deployment hello-node --image=registry.k8s.io/e2e-test-images/agnhost:2.39 -- /agnhost netexec --http-port=8080
Output:
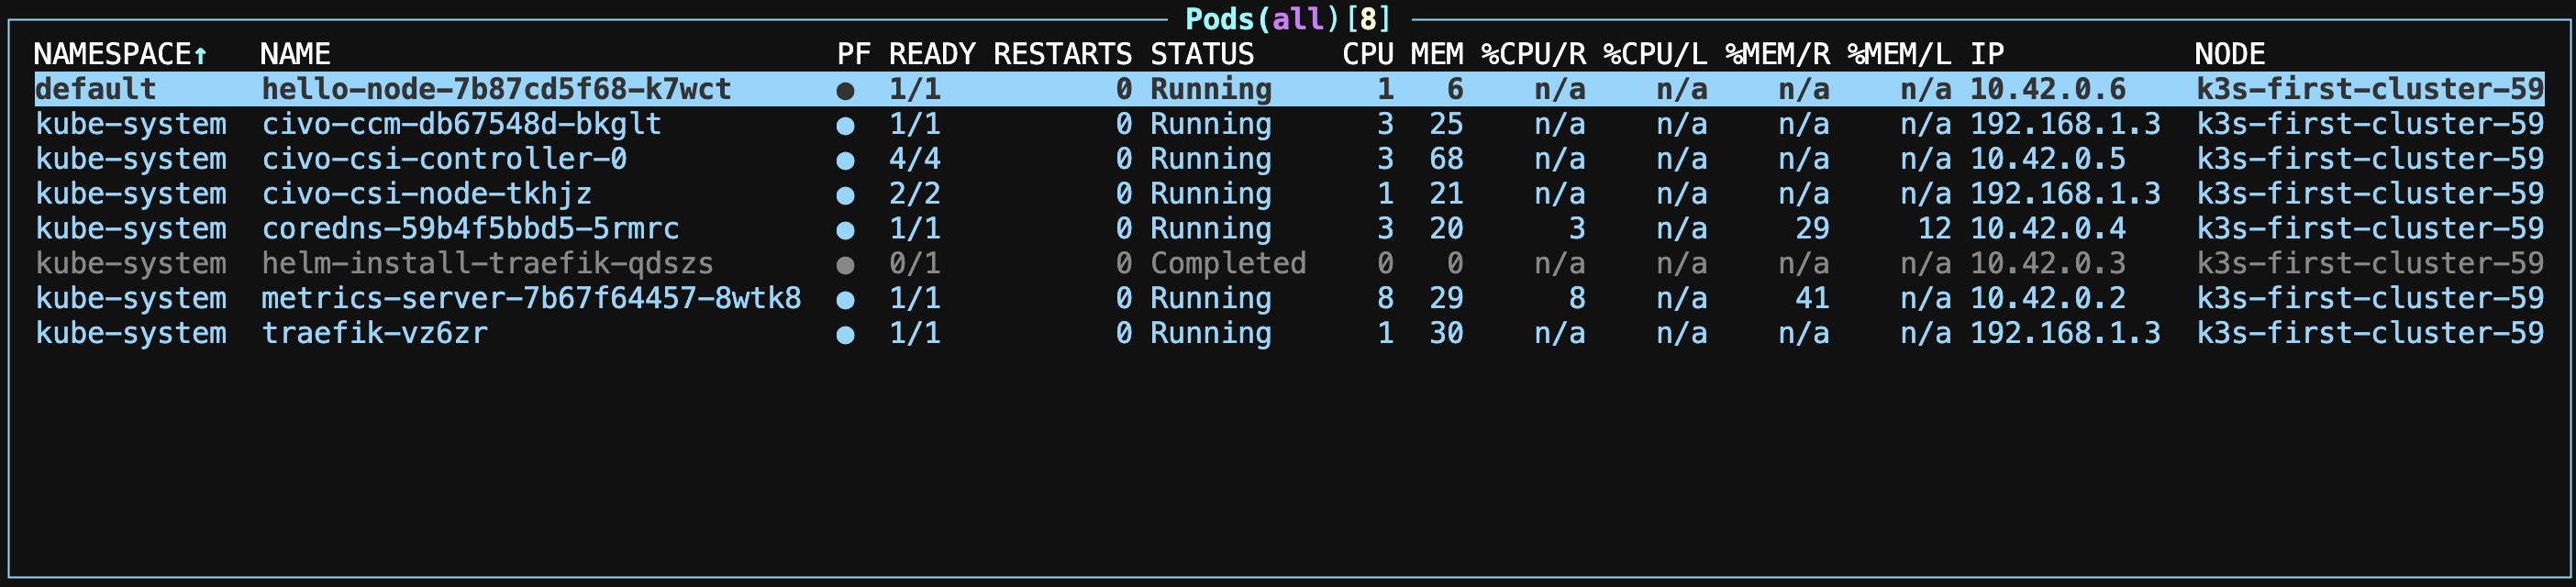
deployment.apps/hello-node created
If you rerun K9s, you can see a new pod in the default namespace:
Or use this kubectl command to see the deployment:
kubectl get deployments
Output:
NAME         READY   UP-TO-DATE   AVAILABLE   AGE
hello-node   1/1     1            1           4m39s
Then, use this kubectl command to see the pod:
kubectl get pods
Output:
NAME                          READY   STATUS    RESTARTS   AGE
hello-node-7b87cd5f68-k7wct   1/1     Running   0          6m34s
First Service
To make the hello-node container accessible from outside, you need to expose the Pod as a Kubernetes Service:
Then, use this kubectl command to create the service:
kubectl expose deployment hello-node --type=LoadBalancer --port=8080
Output:
service/hello-node exposed
Type the following command to get the list of the deployed services:
kubectl get services
Output:
NAME         TYPE           CLUSTER-IP      EXTERNAL-IP     PORT(S)          AGE
kubernetes   ClusterIP      10.43.0.1       <none>          443/TCP          50m
hello-node   LoadBalancer   10.43.227.233   74.220.28.148   8080:31446/TCP   115s
Theoretically, you should be able to "join" your application to this address: http://74.220.28.148:8080. Try this:
curl http://74.220.28.148:8080
Output:
NOW: 2023-09-30 06:07:41.680269458 +0000 UTC m=+291.372218109
You see, it doesn't seem too complicated.
Other useful Civo CLI commands
Get the list of your clusters
CLUSTER_REGION="FRA1"
civo --region=${CLUSTER_REGION} kubernetes list
Output:
+--------------------------------------+---------------+--------------+-------+-------+----------------------------------+
| ID                                   | Name          | Cluster-Type | Nodes | Pools | Conditions                       |
+--------------------------------------+---------------+--------------+-------+-------+----------------------------------+
| 2757362e-ff6b-4d5b-9cdc-488cfd2260b3 | first-cluster | k3s          |     1 |     1 | Control Plane Accessible: True   |
|                                      |               |              |       |       | All Workers Up: True             |
|                                      |               |              |       |       | Cluster On Desired Version: True |
|                                      |               |              |       |       |                                  |
+--------------------------------------+---------------+--------------+-------+-------+----------------------------------+
Delete the cluster
To delete the cluster, use the following commands:
CLUSTER_REGION="FRA1"
CLUSTER_NAME="first-cluster"
civo kubernetes remove ${CLUSTER_NAME} --region=${CLUSTER_REGION} --yes
Output:
The Kubernetes cluster (first-cluster) has been deleted
There you go; now you have everything you need to take your first steps with Kubernetes. In the next blog post, I will explain how to deploy your first web application on your cluster. In the meantime, you can delete the cluster (or play around with it). See you soon.👋